
P016
5 cm Silk Scrunchie Wholesale: Define the Finished Article Before You Quote
We help B2B hair-accessory buyers turn a familiar size label into a usable product brief. A five-centimeter scrunchie can look very different when one supplier measures the visible gathered band, another measures an unfilled tube, and a third measures the outer ring. A 5 cm label sits within a broader accessories conversation, but its measurement basis must be agreed before any configuration is compared. Before we compare a sample or quote, we establish measurement points, relaxed and opened conditions, elastic circuit, seam location, silk surface, variant identity, and selling-unit plan. That keeps a size name from concealing the geometry that determines how the finished accessory looks in a photograph, feels in hand, wraps around hair, and arrives in a retail pack.
Published by China EverBen Silks Reviewed by Mark Liu
Resolve what the 5 cm label actually measures
State the endpoint, condition, outer shape, opening, elastic circuit, seam, and multipack reference.
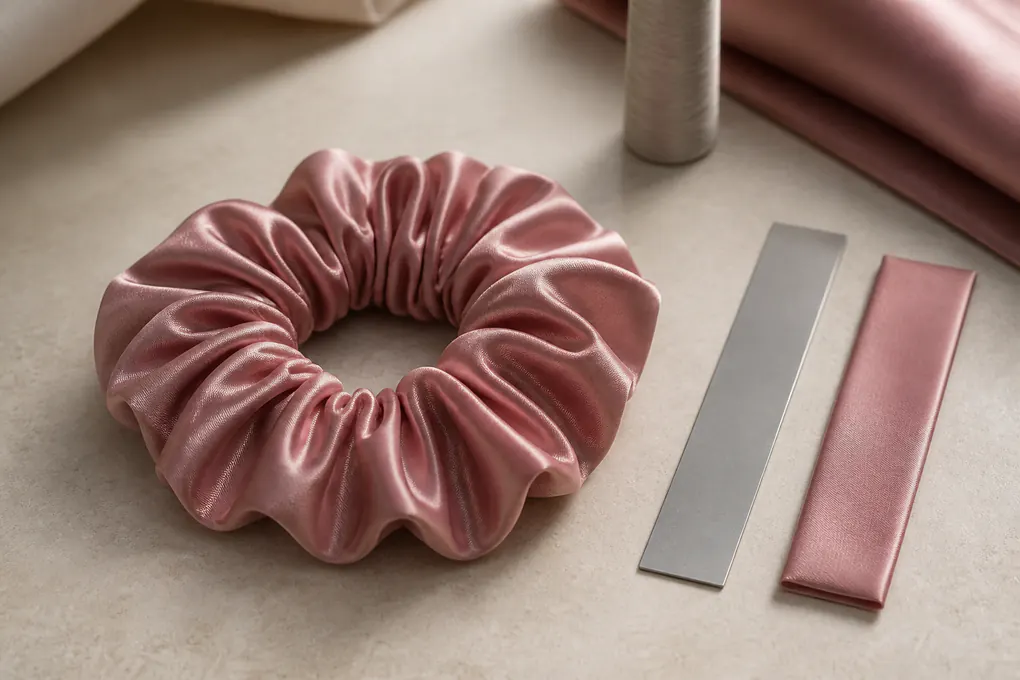
Declare the Exact Point Behind the 5 cm Claim
A size figure is useful only when every reader can put a ruler in the same place. We identify whether the requested five centimeters describes a laid-flat ruffle height, the visible band width at a stated point, an outer-ring diameter, an inner opening, or another agreed measurement. Put that description beside the drawing and sample card, not only in a buyer email.
Separate visible band width from ring diameter
Measure the gathered fabric face and the loop as different attributes
Avoid a sample that appears smaller or larger than its sales label
When a buyer asks us for a 5 cm silk scrunchie, our first question is not which colour to show. We ask what the number is expected to describe. A buyer holding a scrunchie usually sees the ruffled fabric band, whereas a product engineer may begin with the diameter of the loop and a pack designer may be concerned with the article footprint inside a sleeve. Those are separate physical attributes. The band changes with gathering, fabric thickness, seam allowance, handling, and how much the elastic is opened. The loop changes with elastic length, recovery, and the force applied during measurement. Treating them as interchangeable creates a quotation that looks clear until the first sample reaches a merchandising meeting. We therefore give each measurement its own label, unit, condition, and endpoint. A drawing can state the relaxed outer loop across its widest point, then separately identify visible ruffle height measured perpendicular to the elastic path. A buyer can compare those notes with an existing reference item without trying to infer what one number meant.
Write a repeatable measurement condition
Name the article condition before any dimension is measured
Prevent conflicting numbers from different teams using different handling
Measurement condition matters as much as the endpoint. A scrunchie with a gathered silk shell does not behave like a rigid disc. If one person compresses the ruffle and another gently spaces the gathers, both can report a plausible figure while describing different product states. We ask the buyer to choose the condition that serves the purchase decision. For shelf planning, an article placed without deliberate stretching may be relevant. For elastic review, the buyer may need an opened condition with a stated method. For photography, a silhouette can be a visual target, but it should not replace a physical measurement. The specification can distinguish these uses in separate lines so styling language does not become a bulk tolerance. Where the buyer has selected a reference item, state the condition used to inspect that piece before a revised direction is discussed. Ordinary, observable instructions—where the piece rests, how the gathers are arranged, and where the ruler begins—are more useful than asking a team to measure it normally.
Connect the size statement to buyer-facing language
Use a product name that does not overstate an unconfirmed dimension
Keep marketplace shorthand out of the controlled specification
Merchandising language can remain attractive without becoming ambiguous. A buyer may call this article a classic five-centimeter scrunchie, a medium ruffle, or a visible hair accessory in consumer-facing copy. The buyer brief needs a companion statement that identifies what the size reference means. We keep those layers connected but distinct. The product name helps a category team place the item beside 1 cm, 2.5 cm, 3.5 cm, 6 cm, or 8 cm formats. The measurement note tells development and quality what they need to compare. We do not copy a competitor's word such as oversized or voluminous as if it were a technical fact. Instead, the RFQ states the marketing name, the declared measurement point, and the condition. That allows a brand to preserve its own language while suppliers compare the same physical request. It also protects a later repeat order from relying on a product nickname with no usable geometry.
Map Cut Strip Width, Seam Allowance, and Finished Ruffle Height
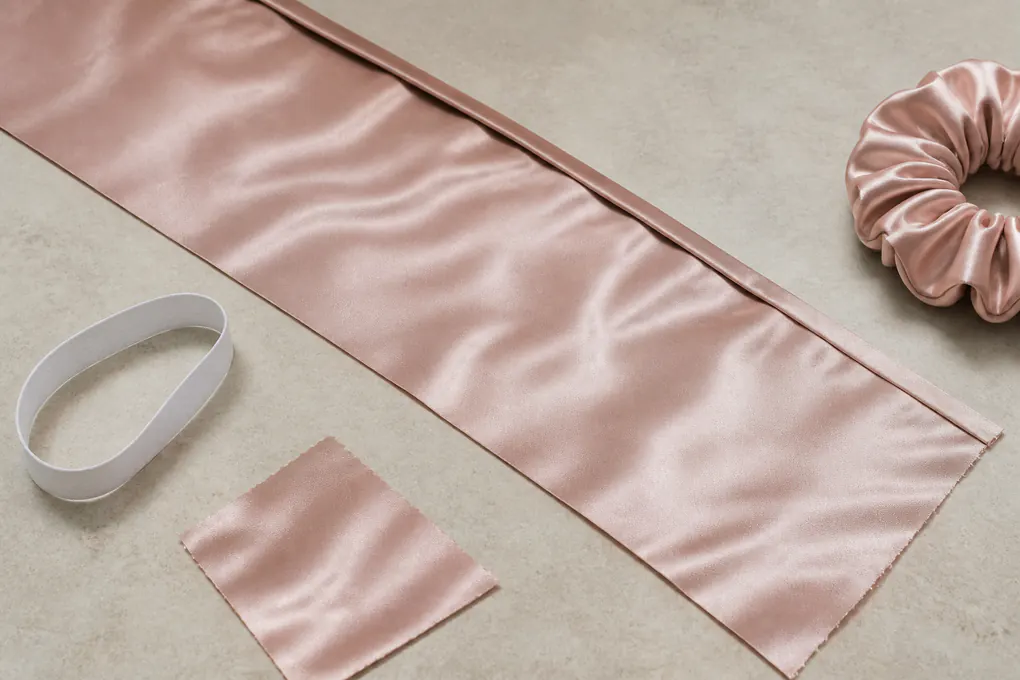
The fabric strip is not the finished accessory. We map cut width, seam allowance, turning method, and gathered presentation so a buyer can understand why a 5 cm visible ruffle may require a different cut pattern than a flat fabric measurement suggests. Physical pattern and customer-facing silhouette must be linked, not confused.
Start with the cut pattern rather than a retail photograph
Relate the raw strip to the visible silk profile after assembly
Avoid losing fullness when seam allowance consumes the planned face
A silk scrunchie begins as a cut component, but the buyer receives an assembled gathered ring. The raw strip width loses material to seam allowance, turning, edge treatment, and the way fabric settles around the elastic channel. A five-centimeter visible ruffle therefore cannot be derived simply by cutting an equal nominal strip width. We discuss the intended finished ruffle, then build the relationship between raw pattern and visible result into the product drawing. The drawing can identify cut width as a construction input and finished face as a buyer-facing measure. Keeping both entries avoids a later argument in which a supplier shows the correct cut piece while the buyer is judging the completed article. For a range containing more than one scrunchie size, simple proportional scaling is risky. A strip that suits a smaller loop can create a crowded or flat mid-size ruffle after gathering.
Choose a seam location that survives gathering
Place the closure so it does not dominate the ruffled circumference
Make the seam a controlled observation instead of a hidden surprise
The closure point can be difficult to see in a loose product photograph and obvious when the article is opened, packed, or worn. We ask the buyer whether the seam has a preferred relationship to a label, a print repeat, a branded trim, or the most visible face of the shell. When no position is specified, the development brief should identify where the seam will be reviewed. An unplanned closure can interrupt a motif, create a hard spot in the gathered ring, or draw attention when the product is displayed on a card. Construction choices can change the appearance at that point: turning direction, stitching sequence, how the elastic is joined, and the volume drawn into the last closure all matter. We keep the desired visible outcome separate from an unconfirmed method. A buyer can specify a discreet join within the ruffle; the actual route must be checked in the sample. That gives quality a concrete feature to inspect in relaxed and opened conditions.
Specify the finished ruffle as a visual and physical result
Balance a full appearance with a readable construction brief
Prevent the word full from replacing a measurable product decision
Fullness is a visible outcome created by the relationship between fabric length and the elastic circuit. It is not established by a single adjective. We invite the buyer to describe the intended effect with reference images, an existing item, or a category position, then identify which observations matter: even gathering, a stated ruffle height, controlled cover over the elastic, or a silhouette that remains suitable in the planned pack. Those observations can sit beside the size definition in the sample brief. A changed fabric-weight reference, seam allowance, or outer-loop size can each alter how the same strip length presents. We therefore avoid treating a fabric-weight reference as a guarantee of a particular volume. If two visual directions remain under consideration, name two development options and the decision each must answer. That approach lets a buyer compare finished articles instead of asking one undefined sample to satisfy conflicting visual expectations.
Set the Outer Loop, Inner Opening, and Wear Condition
The outside ring and usable opening answer different buyer questions. We define the relaxed loop, opened condition, and intended hair-volume reference before an elastic choice is treated as complete. That makes the 5 cm designation compatible with the way the product is handled, displayed, and reviewed.
Distinguish the outside silhouette from the usable opening
State two dimensions when one cannot describe both display and function
Avoid approving a decorative ring that does not match its intended use
The outer silhouette is what a buyer sees in a pack or on a display hook. The usable opening matters when a customer places the accessory around hair. A gathered five-centimeter article can have an attractive outer profile while its inner opening, elastic circuit, or return behaviour may not suit the product position your team is considering. We therefore place outer and inner measures on separate lines. The first supports visual merchandising and size comparison; the second supports the wear or wrap condition the buyer wants to evaluate. Neither should be guessed from a flat photograph. A buyer can provide a retained sample, a physical form, or a stated product-use reference. We do not make cosmetic, hair-health, or universal-fit claims from that reference. We use it to frame a sample question: does the opening and gathered shell create the intended relationship under the agreed condition? Each market or wearer route should be separately identified rather than assumed to share one outcome.
Define how the loop is opened for review
Use a stated handling action instead of an undefined stretch request
Keep elastic review consistent between sample and bulk checks
A request to stretch a scrunchie is incomplete until the action is defined. The buyer can specify a controlled form, a stated circumference, a fixture, or another mutually understood method. The aim is not to simulate every hairstyle; it is to create a repeatable handling condition for the product decision at hand. We recommend using the same opening method for comparative samples because circuit changes can otherwise be obscured by different handling. The same condition also lets a buyer examine gathered shell, seam, and print direction in a useful way. The operating condition must not be silently converted into a permanent performance claim. We keep the review action connected to the buyer's stated question. The checklist can note gather distribution, seam position, visible elastic exposure, return after release, and appearance in the selling unit. The buyer can state the observations that matter for the selected configuration before goods are made.
Link geometry to assortment position
Decide whether this route is a distinct SKU or a size-family member
Protect colour, pack, and replenishment data from size confusion
A 5 cm option often sits between compact and visibly fuller scrunchie formats. That position makes it tempting to reuse every field from a neighbouring size, but the buyer should decide which information is truly shared. Outer-loop geometry, strip width, opening condition, elastic circuit, photography, and multipack count may each need their own entry. We recommend a size-family matrix that shows common brand elements alongside product-specific construction controls. This helps a buyer preserve a coherent collection without forcing an identical physical solution across related sizes. If two geometries remain under consideration, treat them as alternatives rather than an ambiguous range within one line item. Each can have its own sample purpose and drawing reference. Purchasing then sees whether a later change affects the article, the selling unit, or both. This is the difference between a collection that merely looks coordinated and one that can be sourced, checked, and replenished accurately.
Choose the Silk Surface and Direction of the Visible Face
The selected silk component should be described as a component, not as an undefined promise about every part of the accessory. We identify the intended visible face, direction of any finish or artwork, and relationship between shell, elastic, thread, label, and pack materials before product wording is drafted. That preparation gives the purchaser a workable basis for approving a completed article, not an attractive but incomplete material phrase. It also gives merchandising, product, and procurement teams the same visible component to discuss before the range reaches a customer-facing stage.
Identify which component carries the silk statement
Keep the shell separate from elastic, thread, labels, and packaging
Avoid an overbroad material description in buying and retail copy
A scrunchie contains more than its visible shell. The buyer may select a silk fabric reference for the outer gathered component, while elastic, thread, care label, carton, insert card, and closure are different materials with different functions. We write the material statement so it applies only to the identified component. This is a practical safeguard for sourcing and product teams. It prevents a silk-shell direction from becoming an unsupported claim about the entire item, and it tells inspectors which part is compared with an approved reference. A fabric-weight reference can be a starting direction, but the selected route must be confirmed for the exact product before it is presented as complete. We do not infer fibre grade, certification, performance, or universal tolerances from a weight label. The quote brief identifies the component, the agreed reference, and questions requiring confirmation.
Control the direction of the visible silk face
Show how face selection affects sheen, print reading, and seam planning
Prevent a reversible-looking sample from losing the approved presentation
Silk surfaces can read differently as they catch light, fold through gathers, or sit beside a printed motif. The buyer should state which face is intended to be outward and whether direction matters at the seam. This is valuable when the line includes solid colours, tonal branding, or artwork. The instruction need not exaggerate the material. It identifies the visible face and where your team wants to examine that choice on a completed sample. We ask for a clear visual reference, such as a preferred surface appearance, placement side, or relationship between exterior and interior label. If assembly changes the visible result at the closure or in the ruffle field, the buyer sees that difference during review instead of after pack artwork is developed. For a multi-SKU programme, state whether the face instruction applies to every variant or only named colourways.
Review fabric behaviour at gathered and stitched areas
Inspect the finished shell where construction changes its appearance
Make sample approval depend on the completed accessory, not only a swatch
A loose swatch is useful for colour and hand discussion, but it cannot show how a selected fabric route looks after gathering, turning, stitching, and packing. We ask the buyer to evaluate the completed accessory at the ruffled field, near the seam, around the elastic channel, and in its planned presentation. The sample should be viewed in the declared measurement condition as well as its relaxed pack condition. The review can note visible surface irregularity, unwanted distortion, thread show-through, colour-transfer concerns, or a difference from the selected swatch. It should not assume an unconfirmed universal limit. Buyer and supplier can discuss observable points for the selected configuration before bulk production. If a result differs, state its location, condition, and comparison reference. One finding on one fabric or colourway must not be applied to a different article without review.
Plan Gathering Length for a Balanced 5 cm Ruffle
Fabric length around the elastic determines whether the scrunchie looks sparse, balanced, or overly congested. We plan gathering as a relationship between strip length, circuit length, seam position, and the buyer-approved silhouette rather than a multiplier copied from another size or a retailer listing. The selected sample should make that relationship visible around the entire finished ring, including its less-photogenic closure area.
Use fabric-to-elastic relationship as a product control
Connect strip length to the selected circuit instead of using a generic ratio
Avoid uneven coverage and hidden bare sections
Gathering length is a clear example of why a size label cannot describe a finished scrunchie by itself. The same cut strip can create a loose effect on one elastic circuit and a dense ruffle on another. We build the relationship into the drawing for the specific five-centimeter route. The buyer defines the product position and observations that matter, such as even coverage, a controlled visible band, or an opening that does not expose more elastic than expected. The sample then shows how selected components work together rather than leaving a designer to infer intended volume from a style name. A ratio can be a useful planning calculation, but it should not substitute for a finished sample. Fabric properties, seam allowance, strip width, and handling all affect the result. If a buyer is deciding between compact and fuller presentation, two clearly named options are more valuable than one request expected to satisfy both.
Check distribution around the complete circumference
Examine how gathers travel through the seam and elastic join
Catch local flattening before it becomes a pack or display complaint
The ruffle should be examined around the full circumference, not only at the most flattering angle. We look for areas where gathers bunch, separate, flatten, or expose the underlying circuit. The seam and elastic join are common attention points, but the review should also consider how the product settles after it has been handled and returned to rest. A buyer can identify whether a uniformly even appearance is required or whether natural gathered variation is acceptable within the approved visual direction. Inspecting more than one orientation helps: a tabletop view reveals outer-loop balance, a controlled opened view reveals migration along the circuit, and a selling-unit view shows whether a card or band presses the ruffle. Each observation should name location and condition. That is more actionable than asking for better fullness, because it identifies the product relationship that the next sample has to address.
Keep fullness decisions separate from unsupported benefits
Describe the physical silhouette without making hair or beauty promises
Give category buyers usable language without overclaiming
Product teams need language that explains why one scrunchie format belongs in an assortment. We can describe a fuller or more compact gathered silhouette, a stated band width, a pack role, or a relationship to another size. We avoid turning those design observations into unverified hair-care, beauty, or universal comfort promises. The buyer can decide how to position the item in its own customer language after product and compliance review. The useful information here is the construction logic behind the intended visual result. Rather than debate whether the product is premium or gentle, a buyer can specify surface, ruffle height, circuit, seam, and pack context. Those inputs can be quoted, sampled, and checked. When the buyer selects a direction, the brand can use consistent product language across photography, line sheets, selling-unit copy, and repeat-order notes.
Define the Elastic Circuit, Casing, and Return Check
The elastic circuit sits inside the silk shell, yet it controls opening, gathered distribution, and how the article returns to rest. We identify circuit, casing relationship, join location, and sample observation method before treating stretch as a generic product attribute or blanket material claim. That is essential when the visible ruffle and the hidden functional component must work together in a retail-ready item.
Describe the elastic as a separate construction component
Keep circuit length, elastic type, and shell coverage in distinct fields
Avoid a silk claim that accidentally covers non-silk functional parts
The elastic is a functional component inside a silk-shell product, and it should be identified separately. We ask for the intended circuit reference, the way the shell encloses it, and any buyer requirements regarding the join or visible exposure. Exact elastic selection and characteristics must be confirmed for the selected configuration; we do not fill those details with a generic statement. The quote brief should ask what the relaxed circuit is, how it is opened for review, where the join is positioned, and how much elastic may be visible on the finished article. Separating fields prevents material confusion. The silk statement applies to the named shell; elastic, thread, labels, and packaging retain their own identities. A buyer who needs a technical or compliance review can request it for the correct component. The circuit should also be connected to the declared measurement condition so sourcing and quality teams discuss the same article.
Review return after a stated opening action
Observe the finished article after controlled handling rather than guessing durability
Keep a sample finding distinct from a universal performance claim
A return check should begin with a defined opening action and end with a visible observation. The buyer may ask to open the circuit around a stated form, release it, allow it to settle for an agreed period, and compare ruffle and loop against a reference sample. The review can note whether gathers redistribute, whether the seam remains discreet, whether the shell covers the circuit as expected, and whether planned pack presentation is affected. This is a sample-review method, not a promise about every use, user, care practice, or life cycle. We avoid phrases such as never stretches out. Instead, we ask what condition the buyer needs the sample to demonstrate and how that condition will be observed. A structured observation tells the team whether a concern belongs to loop size, shell migration, ruffle distribution, seam tension, or pack presentation.
Protect the casing at the closure and label zone
Coordinate elastic enclosure with seam bulk and brand placement
Prevent a small hidden component from disrupting the visible accessory
The casing is where shell and elastic circuit meet as a finished system. It deserves close review near the closure because the final joining operation can add bulk, distort gathers, or create a point visible on a display card. We ask whether a label, trim, or print element must sit away from that location. The final choice depends on selected construction, but the buyer desired outcome can be clear: controlled visible face, planned seam presentation, and component layout that supports the pack. Where a label is attached to the article, its position should be assessed with the casing rather than added late. It can change how the ruffle sits or introduce a stiff point. During inspection, review a representative completed item, not only a loose shell or elastic. Check casing continuity, closure bulk, visible thread, label relationship, and returned ruffle under the declared condition.
Position Seams, Labels, and Branded Details on the Finished Ring
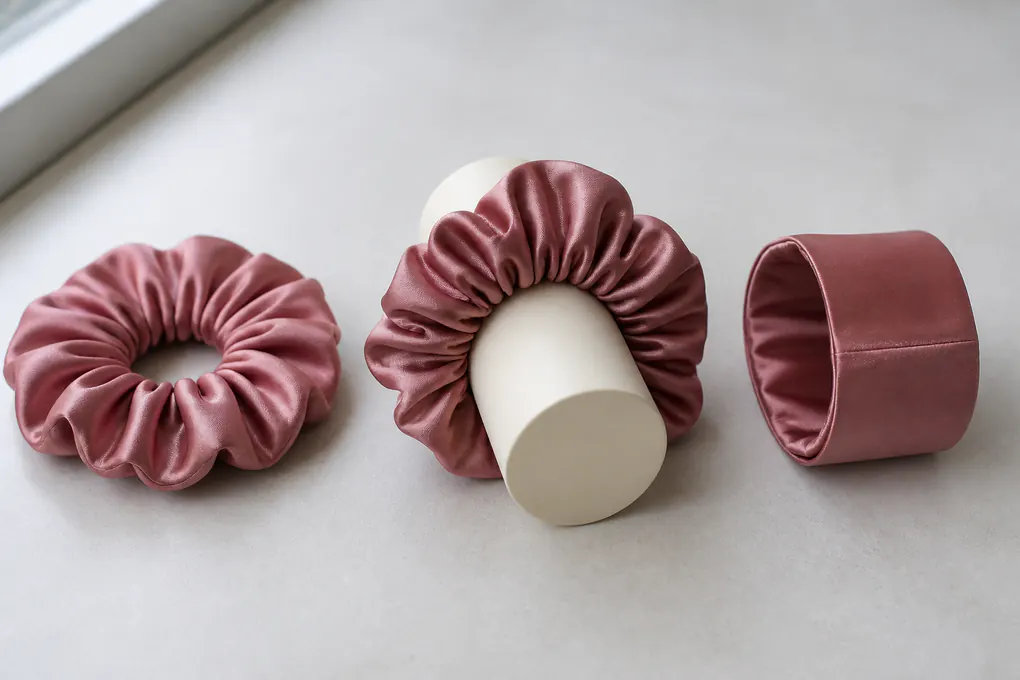
Small components can have a large visual effect on a gathered accessory. We place seam, label, logo treatment, and trim in relation to the visible face, opened condition, and selling-unit presentation so the five-centimeter article remains coherent from sample through replenishment. Each placement choice should survive real handling rather than only a flat artwork layout.
Treat seam placement as a visible design control
Set the expected relationship between the closure and ruffle field
Avoid a join that interrupts the product's most visible area
A seam is not merely a manufacturing detail when the product is a gathered ring. Its visibility changes as the elastic moves and as the ruffle is arranged in a pack. Ask the buyer to mark an area that must remain visually uninterrupted: a front-facing surface, print focal point, label zone, or branded feature. The construction plan can place the closure relative to that requirement. Where the buyer leaves placement open, the first article should still show the seam clearly enough for a buyer decision. Hiding it in photography only postpones the decision. The review should include relaxed and opened observations. A closure that disappears in the relaxed ruffle may pull or become prominent when the circuit expands. Keep the seam instruction beside the current sample description, because a later change to strip width, face direction, print, or circuit can require the closure question to be reconsidered.
Specify label content and attachment zone
Keep product identity readable without changing the gathered silhouette
Prevent a late label addition from altering the approved article
Labels can carry product identity, care information, size codes, or buyer-required data, but they also interact with the physical item. Ask the buyer to distinguish article wording from selling-unit wording. An article label can be useful for loose-product handling, while a pack label may better preserve a clean accessory surface. The correct route depends on channel and market requirements, which must be confirmed for that programme. The attachment zone should be assessed with seam, casing, and visible ruffle. A label near a thick closure can increase bulk; a label in an exposed position can conflict with presentation. Every label version should be linked to its SKU and artwork revision. A five-centimeter article may share colour names with other sizes, but its item code and selling-unit information need independent control to prevent a correct product from leaving with a label intended for a related style.
Coordinate logo treatment with silk surface and pack
Decide where branding belongs before it competes with construction
Keep private-label artwork tied to an authorised product surface
Branding can sit on the product, attached label, insert card, pouch, sleeve, or another named pack component. We do not assume that a logo belongs directly on the silk shell. The buyer should identify the desired touchpoint, buyer-owned artwork, intended scale, and component that will carry it. That makes private-label discussion specific and prevents a broad request to put a mark somewhere on a gathered surface. If artwork is intended for the shell, discuss whether the proposed location remains visible through gathering, how it sits near the seam, and whether it may be covered or distorted by the pack. A mark that looks balanced on a flat layout can become fragmented around a small circular item. When an artwork file changes, pair its name with a plain note stating the scrunchie colour, visible surface, seam location and package component it concerns. That gives the buyer a clear reference for a later repeat order without turning a public product page into a design archive.
Plan Colour, Print Repeat, and Shade Reading Through Gathers
Colour selection is not finished when a name is chosen. A gathered silk ring changes how a solid shade reads, how a printed motif breaks across folds, and how a seam interrupts a repeat. We keep artwork, surface direction, and approval evidence connected to the completed five-centimeter form. This allows a buyer to distinguish a decorative visual brief from the specific pattern and pack checks needed before release, including the selected viewing reference.
Use an approved colour reference for each variant
Connect shade names to a physical or buyer-authorised reference
Avoid a colour name becoming the only production instruction
Colour names are useful for merchandising, but names alone are not enough for a clear buyer discussion. A buyer may call a shade ivory, cherry pink, navy, coffee, or another brand term; the buyer brief should pair that name with the relevant colour reference or sample. This is especially important on silk because the gathered surface catches light at multiple angles and may not read like a flat chip. We recommend that a completed scrunchie be viewed alongside the selected reference in conditions relevant to the buyer decision. We do not claim universal shade matching or assume one reference applies to every fabric route. Each selected configuration needs its own discussion. For a multipack, the colour matrix should show which shades belong together, how each is identified, and which pack-artwork file applies. That is clearer than asking for the usual pink and reduces the risk of mixed variants in a selling unit or carton.
Map artwork through the strip before it is gathered
Show the repeat, focal area, and seam interruption on the finished loop
Prevent a flat artwork proof from misrepresenting the ruffled product
A printed scrunchie is not a flat rectangle after assembly. The repeat travels around a tube, folds into gathers, and meets at a seam. Have the buyer identify authorised artwork, repeat direction, intended focal area, and elements that should not be split at the closure. These inputs let the sample reveal how the design reads on the actual loop. The printed-scrunchie route covers artwork development in greater detail; this page focuses on five-centimeter geometry that changes the visual result. A buyer can provide a placement map or state whether all-over distribution is acceptable. If a motif has a top, bottom, border, logo, or repeated character, the matrix should identify the directional rule. The finished sample, not a website mock-up, is where the buyer decides whether selected artwork works with gathered construction.
Inspect shade and print after assembly and packing
Compare the real selling-unit appearance with the approved visual direction
Catch transfer, fold, and visibility issues before final pack approval
The finished product should be viewed after construction and pack decisions are in place. A colour or print can appear different once silk is gathered, placed against an insert, or compressed under a band. We ask what matters most: a consistent visual relationship within a multipack, a clear focal motif, a discreet seam, or a presentation suited to a chosen channel. The sample note should name colourway, artwork file, product condition, and pack configuration. If an issue is found, state whether it concerns shade, print placement, seam interruption, fold mark, or interaction with a pack component. This is more useful than a generic request to improve appearance because it identifies the relationship that must be reconsidered. These details help purchasing, product, and quality teams return to the selected SKU without relying on a vague colour or style name.
Build Variant and Multipack Identity Without SKU Confusion
A five-centimeter scrunchie may be sold as a single item, paired colours, a coordinated set, or part of a wider silk accessory assortment. We map product identity from article to selling unit so colour, count, barcode, labelling, and replenishment information remain attached to the correct configuration. The matrix provides a practical bridge between a design decision and the inventory identity that a purchasing team must later repeat without ambiguous family shorthand. It also helps a buyer explain exactly which combination belongs in an enquiry, pack mock-up, product image, or future commercial discussion.
Give each physical variant its own controlled identity
Separate size, colour, print, construction, and pack data in the SKU matrix
Avoid a family name that hides a different sellable article
A product family can share a brand story while individual articles need separate product lines. We recommend a SKU matrix with one line for each distinct five-centimeter configuration: style name, size reference, surface or print, colourway, construction route, and selling-unit relationship. This makes it clear when two items are genuinely the same except for colour and when a change to elastic, artwork, or pack creates a separate product. It also prevents a related 3.5 cm or 6 cm style from being treated as interchangeable merely because the collection name is shared. The buyer item code can be included where supplied. If it is not final, a temporary project name should be visibly marked rather than allowed to flow into labels or cartons. A sample card should state exactly which matrix line it represents, because a good result on a solid item may not validate a printed option with another seam map.
Define the selling-unit count before pack artwork begins
Make singles, pairs, and curated sets operationally distinct
Prevent count errors from being discovered after product approval
Count is part of the product, not an afterthought in packaging. A single item, a pair of coordinated shades, and a larger assortment may use the same physical article but require different labels, barcodes, inserts, protection, and photography. We ask the buyer to define selling-unit count and whether components must be individually identified. For multipacks, decide whether colours are fixed, assortable, or selected by a later programme. A phrase such as mixed colours is not enough for a controlled production brief. The matrix can list approved compositions or state which buyer-owned reference governs selection. Where a new mix is proposed, treat it as a new pack configuration for review rather than silently substitute it into an existing code. The intended pack should be examined with completed ruffles inside it because a pair may need different spacing or protection from a single retail article.
Create a repeat-order note that names the selected configuration
Carry product and pack version control into a repeat order
Avoid reopening geometry questions through an incomplete purchase line
Repeat orders become clearer when the buyer brief names the selected configuration precisely. The buyer brief needs to show the measurement basis, outer loop, selected shell direction, circuit review condition, seam or label placement, colour or artwork file, and selling-unit count. A repeat order can point to a known configuration and identify only fields that are changing. If colour, pack count, barcode, or artwork changes, the note should state whether the change affects the article or only the selling unit. Changed pack compression may call for another look at the presentation even if the article direction remains unchanged. The matrix makes these relationships clear before a buyer assumes an earlier discussion covers a new product variation.
Design Pack Protection Around the Gathered Silk Form
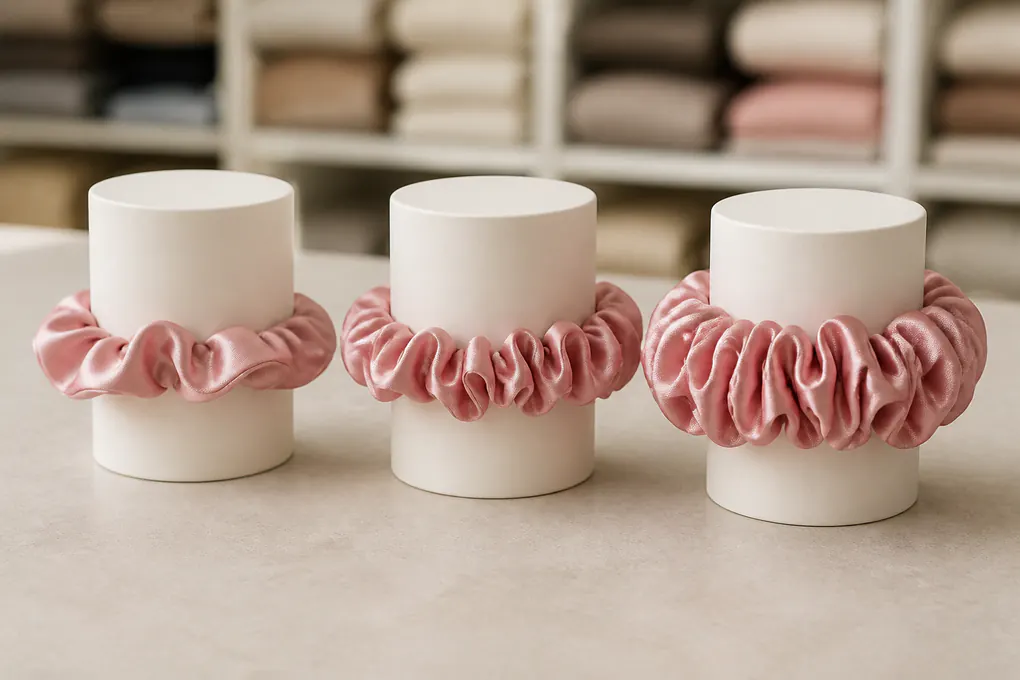
Packout should preserve the product that was approved, not flatten it into a different silhouette. We consider tissue, sleeve, card, pouch, box, band, label, barcode, and outer-carton needs as a system that protects the gathered silk form while serving the buyer channel and count logic. Pack review therefore belongs beside product review, not after the finished article has already been accepted.
Start packaging with the completed article, not an empty box
Review the 5 cm ruffle in its actual selling-unit position
Avoid a pack that compresses the approved silhouette
A pack component should be considered after the buyer has seen the completed scrunchie, not before. A sleeve, pouch, card, or box can present the item well in one channel and create pressure points in another. We ask what the selling unit needs to accomplish: protect the ruffle, hold a multipack count, carry brand information, support a display system, or fit a gift presentation. These needs can be considered beside physical dimensions and product condition already discussed. The sample conversation can include the proposed pack where relevant. A loose item may look balanced, yet a tight band can mark the gathered face, a small card aperture can pull the loop into an unnatural shape, and hardware can contact the shell. We do not promise that any one material prevents every transit effect. We identify the handling concern and describe the observation so the buyer can decide whether the article, pack, or both need adjustment.
Place labels and barcode data where they serve the pack
Separate buyer-facing information from the visible silk surface
Keep operational marks readable without crowding the product
Barcode, colour, size, count, care, and brand information should be assigned to the component where they are most useful. The buyer may want a barcode on a sleeve, a count statement on an insert, and a discreet article label for loose handling. We do not place information directly onto silk by default. Relevant market, channel, and buyer requirements must guide final labelling. A pack layout should identify which data is fixed and which changes by variant. This is important for ranges with many colour combinations or multipack compositions. The buyer can supply its own artwork and data rules; the SKU map pairs them with the named pack layer. A buyer can then compare count, readable identification, product-to-label relationship, and visible condition of the silk item instead of relying on a generic packaging instruction.
Connect inner-pack and carton logic to replenishment handling
Define the pack hierarchy without inventing shipping commitments
Protect count accuracy and product identity across pack layers
The selling unit is only one level of packaging hierarchy. Buyers may also need an inner-pack count, carton-marking fields, or handling instructions for their receiving process. We encourage a clear hierarchy: what is one article, what is one retail unit, what belongs in an inner grouping, and what must be shown on the outer carton. Exact carton dimensions, quantities, and shipping details must be confirmed for the buyer-selected programme rather than assumed from a website example. The risk is not only transit damage. An unclear hierarchy can create mixed SKUs, incorrect counts, lost variant identity, and receiving delays. A sample pack can be opened as a receiving team would open it, with checks for count, labels, condition, and relationship between carton marks and selling-unit data. This makes commercial and logistics fields visible without promising a particular lead time, MOQ, price, carton quantity, or delivery outcome.
Use Samples to Resolve Geometry, Surface, and Pack Questions
A sample should answer named questions rather than merely confirm that a scrunchie exists. We focus the discussion on measurement basis, selected construction, visible silk direction, circuit condition, colour or artwork, seam, label, and pack requirement that the buyer needs to consider next. This avoids spending buyer time on a polished sample that still leaves the essential product choice unresolved. Each discussion point should state the next question, the buyer team considering it, and the visible feature they need to examine. This keeps feedback linked to the same silk article, selling unit, and customer presentation instead of broad impressions from unrelated references.
Give each sample a defined approval job
State the decision the sample must support before it is reviewed
Avoid collecting attractive samples without a clear buyer question
A development sample can answer a geometry question, a material-surface question, an artwork question, a packaging question, or several connected questions. Ask the buyer to state the first decision that matters most. For this size route, that might be visible ruffle measurement, inner opening, seam-to-print relationship, or the way a pair sits in a sleeve. The request can then list the configuration and observations the buyer wants to discuss. This turns the conversation into a focused procurement step rather than a broad request for something similar to an online image. The sample note should name the current variant and pack context. If a change is made after feedback, state what changed and which earlier question it revisits. A favourable photograph alone should not settle an open product question. The buyer can state the written requirements it needs to consider before moving to the next project stage.
Review the complete article rather than isolated parts
Bring fabric, elastic, seam, print, label, and pack into one observation
Keep component approvals from masking a finished-product issue
A swatch, elastic length, artwork proof, and pack drawing can each be useful, but none replaces a completed article review. We recommend examining the assembled scrunchie in declared measurement condition and then in its planned selling unit. This reveals relationships that isolated components cannot show: how shell covers circuit, how seam appears through gathers, how a print breaks, how a label sits, and whether pack alters silhouette. The observation sheet should list product feature, reference, condition, finding, and buyer action instead of a pre-filled pass conclusion. The buyer must agree inspection basis and acceptance approach for the programme; we do not create unverified limits on this page. If an issue is found, the team can see whether it belongs to geometry, surface, assembly, artwork, or pack design. That makes the next revision purposeful.
Describe product changes so the next comparison stays clear
Link every revision to the decision it is meant to resolve
Prevent an updated sample from erasing the reason for a prior decision
A useful sample programme describes changes plainly. If strip width changes, the buyer should see whether ruffle height, opening, or seam presentation may change. If circuit changes, opened condition and returned silhouette should be considered again. If artwork or pack changes, state whether geometry was held constant. This prevents a revised sample from being treated as the same product direction without a useful comparison. A concise buyer note can identify the current variant, changed feature, reason and visual point that needs attention. This guide keeps the focus on the product questions a buyer should ask about a five-centimeter scrunchie. When the buyer moves forward, the selected configuration should state the measurement method and selling-unit direction in plain language.
Assemble a Commercial Matrix for the Exact 5 cm Scrunchie
A credible RFQ lets a supplier see the exact article the buyer wants reviewed and lets the buyer compare responses against the same fields. We close this guide by assembling geometry, material scope, construction, artwork, pack, sampling, and commercial questions in a comparison matrix for this five-centimeter article. It makes unknowns visible early, before they become assumptions inside a price comparison or sample approval, and supports a disciplined written response.
List product facts before commercial questions
Start the RFQ with the actual 5 cm configuration and open decisions
Avoid a quotation that prices an undefined family of possibilities
The first part of the matrix identifies the product direction: size basis, measurement endpoints and condition, outer-loop reference, intended visible face, selected shell direction, circuit question, seam or label requirement, and colour or artwork file. These details tell a supplier what article is being considered. If a field is undecided, mark it as an open buyer question rather than quietly filling it with a default. Next, list selling-unit structure. State whether product is a single, pair, or set; identify colourway composition; note buyer-owned SKU code; and describe pack role. Include intended destination market only where relevant to buyer requirements. This buyer guide does not establish regulatory, certification, price, lead-time, or MOQ commitments; those matters need configuration-specific discussion. A concise matrix gives every stakeholder a place to add the information they own and makes supplier responses easier to compare consistently.
Add the sample and inspection observations that matter
Turn buyer concerns into checkable lines on the RFQ
Make quote comparison useful after the first sample arrives
The matrix should include the sample question blocking a decision. The buyer may need to compare ruffle height under a declared condition, review an opened loop around a reference form, check print behaviour at the seam, or evaluate whether a multipack supports the gathered shell in the intended presentation. Each question names the configuration and planned observation. Quality lines should be product-specific. Instead of requesting a generic inspection statement, list measurement points, gather distribution, shell coverage, seam presentation, label relationship, colour or artwork relationship, pack count, and visible condition in the selling unit. The buyer can state the observations and sampling approach it needs to discuss for the programme. If documentation, testing, or compliance information is needed, name the scope, market purpose, and buyer decision it is intended to support. That is clearer than a broad request for certificates that may not apply to the selected item.
Finish with buyer-owned approval and contact inputs
Identify the people, references, and decisions needed for a useful response
Move from an attractive concept to a controlled sourcing conversation
The final rows of the RFQ state who will review the product, which reference files are authoritative, when a sample decision is needed, and which commercial questions require a response. A buyer may include planned quantities, target market, packaging needs, and requested terms where available. If those fields are not ready, mark them open rather than guessing. We invite buyers to use the page CTA to provide a measurement basis, product reference, colour or artwork direction, pack count, and highest-priority sample question. The in-page form keeps the enquiry tied to this product route without requiring an email application. When the matrix is complete, the buyer has a distinction between confirmed inputs, requested recommendations, and items needing configuration-specific verification. That is the foundation for a disciplined B2B conversation from first sample through later replenishment.
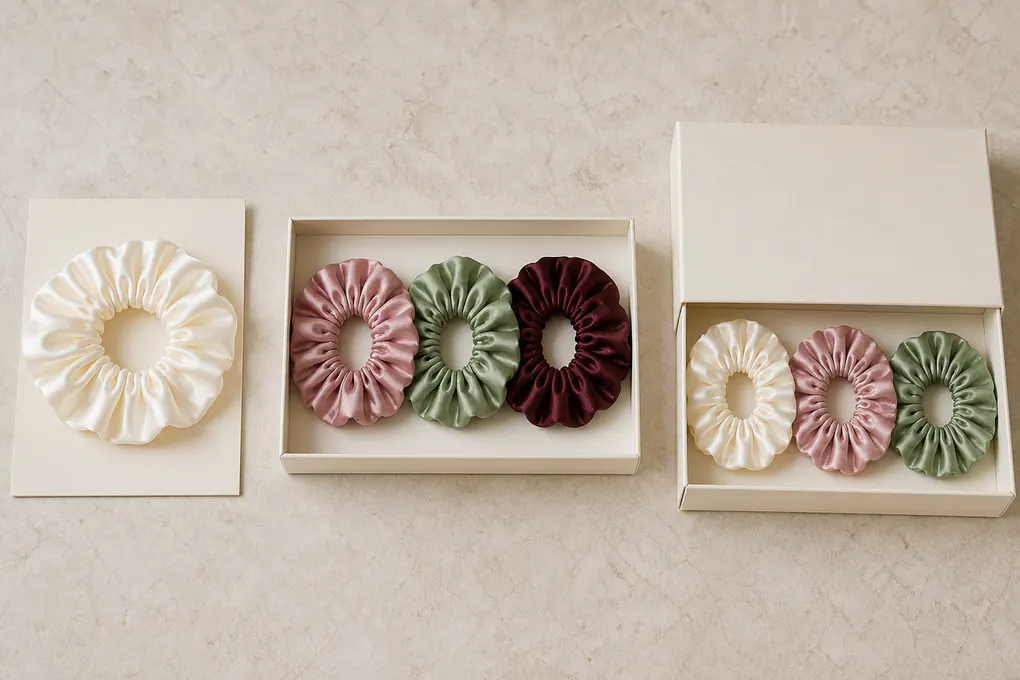
5 cm silk scrunchie buyer questions
Does 5 cm describe one universal scrunchie size?
No. State whether the figure refers to visible ruffle height, outer-loop diameter, inner opening, a laid-flat measure, or another declared point, and state the condition used to take it.
Can one silk statement apply to every scrunchie component?
No. Identify the silk shell separately from elastic, thread, labels, and packaging so each component can be reviewed against the appropriate product requirement.
What should a wholesale 5 cm silk scrunchie RFQ include?
Include measurement method, outer loop and opening reference, selected fabric direction, elastic and seam questions, colour or artwork version, selling-unit count, pack needs, and the sample decision that remains open.