P018
Custom Tie Silk Bonnets for B2B Product Development
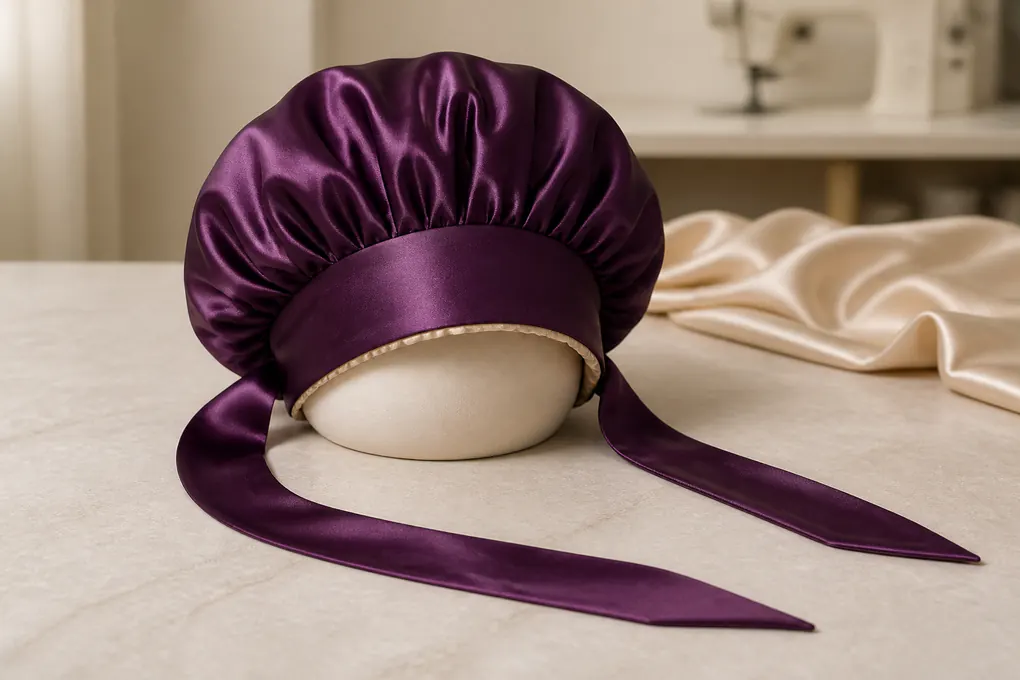
A tie bonnet is not a generic cap with two loose ends. The crown must hold the intended hair arrangement; the entry edge must work with the selected crown; and the ties must travel, anchor, and settle in a way your product team can show on a chosen sample. We turn those connected decisions into a clear sourcing document for a named tie silk bonnet. You bring the target customer, visual direction, commercial channel, and any non-negotiable requirement. We help organize the crown pattern, component scope, tie route, artwork, pack, and review questions so a quote or sample request describes one product rather than a collection of assumptions.
Published by China EverBen Silks Reviewed by Mark Liu
Keep bonnet crown and tie behavior linked to the wearer decision
State the crown dimensions, panels, layers, tie path, anchors, hair-volume context, and pack need.
Convert a Tie Bonnet Concept into a Specified B2B Product
We begin by separating a usable buyer direction from the attractive but incomplete language often attached to a hair accessory concept. A retail beauty brand, salon program, subscription business, or private-label launch may know that it wants a tie silk bonnet, yet still need to decide whose hairstyle it is meant to accommodate, where the bow sits, whether the outer and hair-contact faces differ, and how the finished item should be presented. Those choices affect the pattern, assembly, artwork file, and sample your team approves. We treat the product name as a starting point and build a scoped item beneath it, distinguishing confirmed instructions, alternatives for review, and values that still need written direction. The result lets design, purchasing, creative, and quality colleagues work from the same product description instead of rebuilding the meaning from separate emails, photographs, and shorthand terms.
Name the commercial role before choosing a silhouette
A tie bonnet needs a defined buyer, channel, and product position
Avoid a sample that answers no real assortment question
We ask what job the tie bonnet has inside your range. It might be an adjustable option beside an elasticized bonnet, a higher-coverage style for a hair-care assortment, a giftable accessory, or a focused private-label launch. The answer changes the product details your purchasing team needs to compare. A range extension may require visual distinction from an existing SKU; a salon program may need a particular pack format; a subscription item may need a variant system that fulfillment can recognize. Describe the actual channel, customer context, selling-unit format, and adjacent products. That information is more practical than asking generically for a luxury bonnet because it tells the product team which decisions must be visible on the selected article and which can remain options while the commercial plan is settled.
Separate fixed instructions from open design choices
A practical brief shows facts, options, and unresolved decisions
Keep inspiration from turning into an unintended commitment
We separate fixed directions from subjects on which you want recommendations. Fixed directions may include your artwork file, selected label language, named selling channel, or product reference. Open choices may include crown panels, the number of layers, tie placement, or the way the bonnet is folded. This separation stops a mood-board image, competitor listing, or prior sample nickname from silently becoming a manufacturing instruction. When an image is visual inspiration only, say so. When a particular feature must follow your chosen reference, identify that feature precisely. A purchasing brief becomes easier to compare when every reader can see what is mandatory, what is still being explored, and what requires a sample decision.
Give the tie bonnet its own SKU identity
One product brief connects construction, presentation, and comparison
Do not hide closure or component differences behind one style name
We encourage a product brief that names the intended silhouette, crown route, tie route, visible color or print, component scope, and pack relationship for the specific SKU. A family term such as silk bonnet can include very different articles: a simple crown, a lined form, an extended silhouette, an elastic opening, or a tie-adjusted design. Treating all of them as the same item creates ambiguity in quotations, photography, and receiving checks. Give each meaningful configuration a clear version name and describe the visual, construction, or artwork change being compared. Then a buyer can compare an early prototype with a later sample without guessing whether a changed tie, label, lining, or fold belongs to the same product. This keeps the commercial conversation centered on the item your customer receives.
Set Crown Shape, Panel Layout, and Hair-Volume Intent
We develop the crown as a three-dimensional part of the finished bonnet, not as a flat photograph. Capacity is created by the relationship between pattern pieces, gathering, seam placement, depth, and the opening where the wearer enters the product. A crown that looks generous on a hanger can crowd the chosen style after the crown is occupied; another can look elegant when empty yet collapse or twist after tying. Your range does not need to claim a universal fit to address those risks. It needs a named use scenario, a construction route that reflects it, and a sample review that observes the selected configuration under conditions your product team understands. That gives a retail buyer a useful assortment decision without promising an identical result across every hair type, styling preference, or customer. Before comparing routes, ask which customer problem an extended crown, compact form, or visibly adjustable option is intended to solve; this removes vague sizing language from the buying discussion.
Describe the intended filled crown rather than an empty outline
Hair arrangement and crown volume must be considered together
Select space where the product needs it instead of enlarging everything
We start by establishing how a wearer arranges hair before putting the bonnet on. The relevant scenario may involve loose curls, a gathered style, braids, locs, rollers, or longer lengths directed away from the face. This is not a promise that one bonnet suits every person; it is a practical design input. State where the hair mass sits, whether lift is needed above the scalp, and which part of the silhouette matters to your customer. A pattern team can then discuss whether panels, gathers, an extended section, or another shape route creates usable room. During sample review, inspect containment, the dressed silhouette, empty pockets, crowding, and the relationship between crown space and the selected tie setting.
Use panel geometry to direct volume with purpose
Crown pieces, gussets, and gathered zones influence the worn article
A construction sketch gives clearer direction than an undefined request for added crown volume
We translate the intended silhouette into a panel conversation. A gathered crown distributes fullness differently from a shaped multi-panel crown; an extended back section can create capacity without altering the whole perimeter; and a gusset can place volume where a buyer expects it. Each route also changes seams, artwork behavior, turning, and the inside view. Ask to see the construction flat and assembled, then examine it on a representative form or fit participant. Note whether gathers settle evenly, whether a seam becomes prominent when the crown is filled, and whether the tie path pulls the silhouette off center. An annotated pattern or sample photograph gives useful direction for revision without pretending that a universal crown exists.
Keep customer variants tied to meaningful capacity differences
Each range option should solve a recognizable use need
Avoid multiple names for nearly identical crown volume
We recommend adding a tie-bonnet variant only when the customer can understand what changes and why. A compact crown, an extended-volume version, and a more adjustable route can make sense if each has a distinct hair arrangement or wearing context behind it. Three nearly identical products with different names usually create inventory complexity without assisting a buyer or end customer. For every option, state the physical distinction, the use situation, the label or pack cue that identifies it, and what the sample comparison revealed. That clarity helps merchandising describe the range accurately, lets purchasing request comparable configurations, and gives quality reviewers a direct way to distinguish an intentional variant from an unplanned pattern change.
Measure Crown Diameter, Depth, Opening, and Finished Shape
We use measurements to make the selected tie bonnet repeatable, not to create a false impression of universal performance. Crown diameter, depth, opening circumference or laid-flat distance, band width, panel positions, and tie locations only become useful when the brief also states the measuring point, the product condition, and the unit. An unfinished piece, an empty finished bonnet, and a bonnet arranged on a representative head form can produce different observations. Your brief should show which condition governs each decision. This allows a supplier to understand what a number means and allows your team to compare the sample with the same reference rather than relying on memory or a marketplace image. It also creates a practical basis for later product changes when a tie, edge, or panel changes. When several size routes are under consideration, keep their dimensional details separate so a sample result is never applied to an unreviewed variant. Include a simple drawing, measurement photograph, or chosen reference only where it clarifies the specific point under review; a broad category image cannot replace a named physical measurement.
Mark measurement points on the pattern and assembled sample
Crown diameter, depth, and opening need named start and end points
A number without a stated condition cannot guide review
We advise marking every dimensional request where it is taken. For a circular or gathered crown, identify whether a diameter belongs to a flat pattern piece, a finished outer edge, or a relaxed assembled product. For depth, show the route from crown apex to opening or band and state whether the product is laid flat, lightly arranged, or worn on a representative form. Opening measurements also need a condition because gathering and tie adjustment change what a ruler sees. Include the unit and your chosen comparison method. The aim is not to impose a tolerance that has not been agreed; it is to remove the uncertainty that causes different teams to measure different parts of the same bonnet.
Connect opening geometry to the intended entry sequence
The wearer must enter, settle, and adjust the selected article
Review the opening with the crown and ties rather than in isolation
We look at entry as a sequence. The wearer gathers hair, brings the bonnet over or around the intended area, settles the crown, and then follows the chosen tie route. A wider opening can alter crown balance; a deeper crown can affect how the edge sits; and a tie position can support or disrupt the dressed form. Write the sequence your product team expects to review and define the observation that matters, such as entry ease, crown placement, visible edge position, or tie access. This approach is more reliable than attaching one-size language to a drawing. It gives the sample reviewer a specific action to perform and a clear basis for requesting a pattern change.
Use a finished-shape review before releasing a dimension set
Flat measurements need a companion observation of the worn silhouette
Prevent a technically measured item from missing the visual brief
We ask teams to compare dimensions with the finished shape after the bonnet has been assembled and adjusted. Review whether panels settle symmetrically, whether the crown appears intentional from relevant views, whether the edge and ties meet the expected areas, and whether added room creates unwanted bulk. Keep comments specific: identify sample version, product condition, location, and change requested. A note that says the bonnet should look better is difficult to carry into another sample; a note that identifies an off-center crown seam or an opening that shifts during the selected tying sequence is actionable. This preserves your visual intent while keeping measurement notes specific.
Choose Single or Double Layers by Component Role
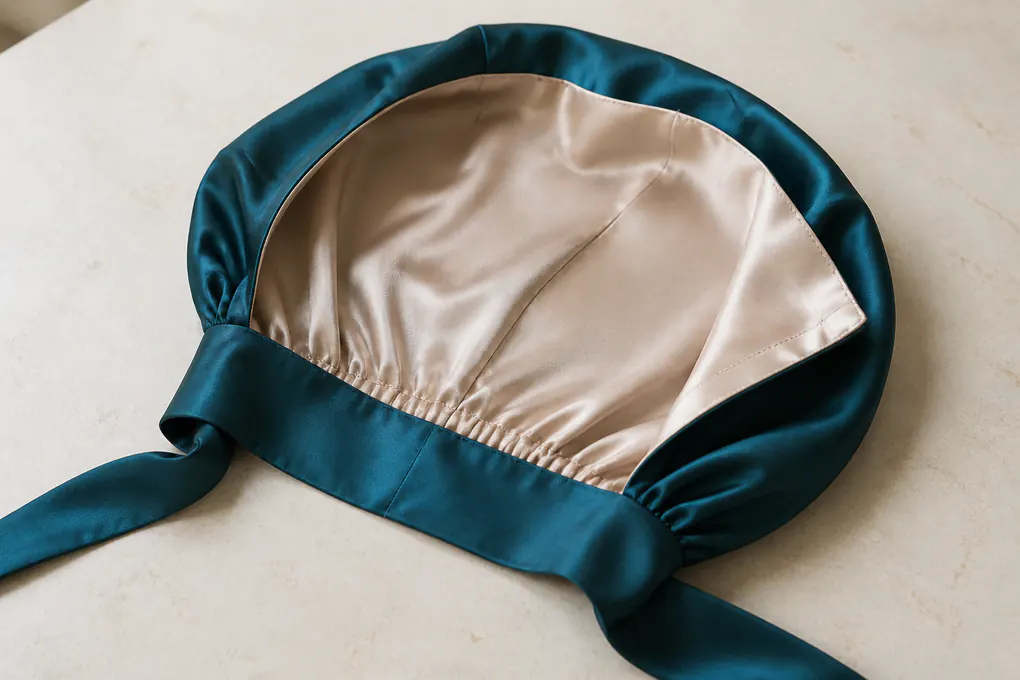
We treat layer count as a construction decision with customer-facing consequences, not as a shorthand marketing phrase. A single-layer tie bonnet, a lined design, and a reversible concept can share a broad category name while differing in hand, seam treatment, visible faces, label placement, and the way the customer uses the article. The useful question is not which description sounds more premium. It is what each component is intended to do in the selected product. Your team should identify the outer face, the hair-contact face, the band or edge, the ties, any reinforcement, labels, and trims without letting a claim about one element become a claim about all elements. That component map gives retail copywriters and buying teams a common boundary for accurate language. It also helps a buyer compare supplier proposals that appear similar in photographs but specify different visible faces, edge treatments, or closure components. We use the selected sample to make those differences visible before they become product descriptions, purchase-order notes, or pack artwork.
Declare which components are intended to use silk
Component-level language protects product copy from overstatement
Do not let the category name replace the bill of materials
We encourage buyers to state the requested material scope component by component. Identify whether the selected silk direction applies to the exterior crown, interior face, both faces, ties, band, or another named part. Where a component has not been selected, identify it as awaiting specification instead of treating it as crown material. This matters for a tie bonnet because a visible ribbon-like tie, a concealed reinforcement, a label, and a contact edge can each require separate discussion. Clear component language improves quotation comparisons and gives marketing teams a defensible foundation for future copy. It also prevents a customer from receiving an article whose material story differs from the one implied by an incomplete product name.
Evaluate a single-layer route as a complete product choice
An uncomplicated layer plan still needs intentional edges and seams
The inside view belongs in sample review
We do not treat a single-layer design as a lesser version of a lined bonnet. It can be the deliberate choice when the range calls for a lighter construction, a particular drape, a straightforward silhouette, or a focused component scope. The sample review should still look at inside surface, seam enclosure, edge treatment, tie attachment, and label position because each may be visible during use. Explain which face the customer is expected to see, how raw edges are addressed, and whether the product is intended to be worn in one orientation. This lets your team evaluate the actual article rather than comparing it to a double-layer reference belonging to another customer proposition.
Treat a double-layer or reversible concept as two visible faces
Both sides must work with the crown, ties, labels, and customer story
A contrasting lining does not automatically create a reversible product
We review a two-layer concept from both orientations before it becomes a customer-facing statement. If the bonnet is meant to be reversible, inspect labels, seams, edge finish, tie direction, print orientation, and the way the crown settles on each side. If the second face only supports construction or provides visual contrast, describe that narrower purpose honestly. The selected layer relationship should appear in the product brief, sample notes, pack language, and quotation request so a later colorway or crown change does not alter the customer statement by accident. This gives a buyer a real choice between a lined article and a genuinely two-sided wearable product instead of relying on a photograph that hides the inside.
Define Tie Width, Length, Path, and Anchor Construction
We consider the ties as functional components of the bonnet, not decorative tails added after the crown is finalized. Their width, cut direction, length, taper, route, anchor location, and edge treatment influence the visual language of the style and the way the customer operates it. A buyer may want a bow at the front, a knot at the side, a wrap at the nape, or a tie that disappears behind the crown. Each route changes the forces at the anchor and the areas a reviewer needs to inspect. Rather than promise that a tie will hold every hairstyle or feel identical for every wearer, we help you specify the selected adjustment mechanism and the physical question the sample must answer. The chosen route becomes part of the identity of the finished product, not a minor trim decision. A clearly described path also lets customer service, photography, and packaging teams present the same use direction as the sample reviewer. It creates a better comparison between alternate closures because each option can be judged with a shared crown, customer scenario, and visual brief.
Choose a tie proportion that fits the product silhouette
Width, taper, and visible length are deliberate visual decisions
A bow or wrap must look intentional after the crown is filled
We ask where the tie will be visible after the bonnet is adjusted. A narrow tapered end, wider band-like tie, or longer wrap can create very different visual results even when the crown pattern is unchanged. State the desired bow, knot, wrap, or trailing-end appearance and identify whether the tie sits at the front, side, back, or another named position. Then review the proportion on an assembled sample with the intended crown volume. A tie that looks balanced on an empty form can appear too short, bulky, or misplaced once hair fills the product. Recording the selected result gives pattern, sewing, photography, and merchandising teams the same target without inventing an unverified performance claim.
Map the tie route from anchor to final adjustment
A clear path prevents a beautiful sketch from hiding a difficult operation
Show where the customer begins and ends the tying sequence
We describe the path a customer follows, beginning at each anchor and ending at the selected bow, knot, or wrap. Note whether the ties cross, pass through a channel, sit over the band, travel under hair, or attach to a separate panel. If the user needs to adjust the crown before tying, state that order. These details matter because a path that looks clear in a flat image can become confusing after the crown is filled or after a label and seam are added. During review, ask someone unfamiliar with the sample to follow the written sequence. Their questions can reveal missing direction that a product designer no longer notices.
Specify anchor construction where tension changes direction
Anchor points and nearby seams deserve focused inspection
Treat reinforcement as a defined construction choice, not an assurance
We identify the point where each tie joins the bonnet and the surrounding construction that supports it. The product brief should show whether the tie enters a seam, lies under a band, joins a panel, or uses another deliberate route. It should also name the visible finish, inside treatment, and any buyer-selected reinforcement direction. Do not substitute a broad strength statement for that information. On the sample, inspect alignment, seam continuity, local bulk, stitch appearance, and how the anchor behaves during the selected tying action. When a concern appears, describe the location and condition rather than asking for stronger sewing in general. That gives the next sample a precise construction issue to resolve.
Review Entry, Adjustment, and Fit on the Selected Sample
We use a sample to observe a defined wearing sequence, not to turn one demonstration into a universal claim about staying on or comfort. The relevant sequence may include gathering hair, opening the bonnet, placing the crown, settling the edge, following the tie path, and checking the dressed form from the views important to your range. If your buyer team needs a compact style, extended style, or several hair-volume scenarios, identify each as a separate review context. The useful output is a written observation: which sample was used, which condition was reviewed, what appeared, and what decision follows. That is more valuable to purchasing than an unqualified promise built from a single image. It also gives product managers a direct basis for selecting, changing, or separating a configuration. Your comparison notes should show whether the sample was empty, filled, adjusted, folded, or unpacked when the observation was made. Keep the relevant configuration in view rather than using a visual from a different crown or tie setting to justify the result.
Write the sample fitting sequence before review begins
A consistent sequence makes fit comments comparable
Capture the product action that exposes the real issue
We recommend a short product-specific sequence for every fit review. Start with the intended hair arrangement; state how the bonnet enters; identify how the crown is positioned; and specify the tie action a reviewer should use. Then name observations that matter, such as crown space, edge placement, access to ties, visible balance, local compression, or movement after adjustment. Give reviewers a simple way to identify the sample version and configuration. This does not require an elaborate laboratory protocol. It prevents one person from judging a bonnet after a loose wrap while another judges it after a tight bow and treating the comments as if they describe the same product condition.
Review adjustment against the selected customer context
Tie flexibility should be examined with an identified use scenario
Describe what was observed instead of promising the same result for everyone
We encourage buyers to replace broad one-size wording with a named review context. Identify the representative hairstyle or hair-volume situation, the tie setting examined, and the point of concern. A reviewer can note whether the crown settles as intended, whether the entry edge moves during tying, whether the tie remains accessible, and whether the finished silhouette matches the visual brief. These are observations about a particular sample and condition, not proof of a result for every wearer. If your range needs several contexts, build them into the sample plan as separate rows. That lets your product team decide whether one design is sufficient or whether the assortment needs a distinct capacity or closure route.
Turn fit comments into a sample revision decision
Specific comparison points help a pattern change solve the correct problem
Move from an opinion about fit to an agreed product action
We capture comments in a form that the next sample can use. State the product reference, reviewed condition, crown area, edge or tie location, visible result, and requested action. For example, identify a tie anchor that sits too close to a panel seam in the chosen bow position rather than writing that the closure feels wrong. Identify a crown section that creates an empty pocket under the stated hair arrangement rather than asking for better fit. This discipline prevents a supplier from guessing which part should change. It also gives the buyer a clear reason to retain the pattern, change the tie, alter the opening, or introduce a separate version.
Place Seams, Labels, and Contact Surfaces Deliberately
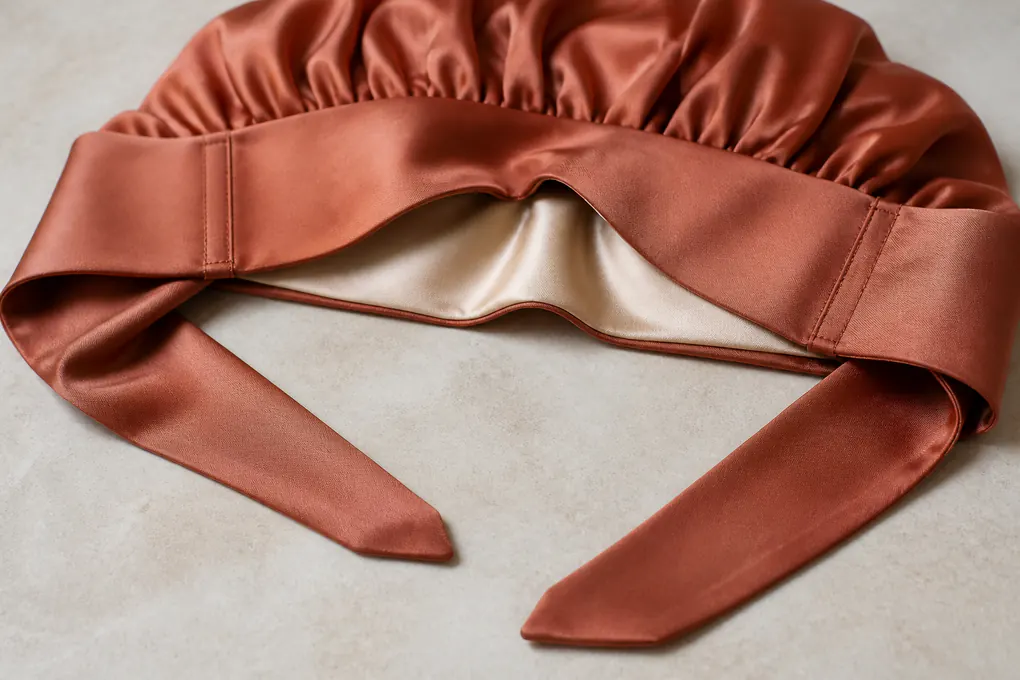
We do not leave interior details until after the exterior is selected. On a tie silk bonnet, seam positions, edge finishes, labels, tie anchors, and contact surfaces can change what the customer sees and feels during dressing. A structurally acceptable join may interrupt a smooth area, sit beneath a bow, show through a lighter face, or make a reversible direction impractical. Your design brief should identify which seams are visible, which surfaces face hair, which areas are intended to remain visually clean, and where labels or care information belong. The result is not a generic comfort claim. It is a map of the particular areas your sample review and quality checks need to examine. Clear placement information also prevents pack artwork or photography from showing the product in an unintended orientation. It can additionally help a buyer decide which views need to appear in product imagery, instruction inserts, and selection photography. Where a product uses contrasting faces or a prominent bow, include these details in the visual review before final artwork is chosen. Treat that map as a shared instruction for design, sewing, visual merchandising, and final product selection.
Use seam placement to protect intended visual surfaces
Panel joins should support the silhouette and artwork direction
Review the bonnet from front, side, inside, and tie position
We review seam placement alongside the selected silhouette. A crown seam can become a feature, disappear within a gathered area, or create a distracting line across a visible surface. A join near the edge can alter how the bonnet frames the face; a seam under a tie can create local bulk; and a printed panel may need a planned seam allowance so a focal motif is not lost. Mark intended visible areas on a drawing or chosen sample and identify joins that must be checked from both sides. This gives design and quality teams a shared visual reference. It also prevents a later construction change from moving a seam into an area your customer is expected to notice.
Locate labels where the product remains usable and clear
Brand, care, and size information need an intentional attachment point
Do not let a necessary label undermine a refined or two-sided design
We ask buyers to state which label types are required, which markets they serve, and where the product team expects each to sit. A brand label, care label, size identifier, or pack label can have different placement needs. On a tie bonnet, the location should be reviewed with crown orientation, visible faces, tie route, and potential reversibility. A label unobtrusive in a flat sample can become prominent when the customer ties the bonnet or turns it inside out. Provide artwork and wording your organization has selected, then use the physical sample to compare attachment position, readability, and the relationship to seams and contact zones.
Identify contact surfaces without unsupported benefit claims
Describe the areas that touch hair or skin with precision
A component map is more credible than a broad wellness statement
We distinguish exterior crown, interior face, edge or band, ties, seam allowances, labels, and any trim that may contact the wearer during ordinary use. This lets a buyer decide which finishes or component directions need attention and ensures that a product description does not imply every part shares one material or surface property. During sample review, look at selected contact zones in the actual wearing sequence and note any product-specific concern. Keep the language factual: describe placement, construction, and appearance rather than making hair or wellness promises that the chosen configuration does not establish.
Develop Color, Print, and Surface Directions Without Guessing
We connect colour and print choices to the cut-and-sewn form of the tie bonnet. A flat digital artwork may look balanced before it reaches crown gathers, seam allowances, bow ends, or a folded selling unit. A solid colour still needs a selected visible face, a chosen reference, and an understanding of how the ties relate to the crown. Product teams lose time when a screen image, supplier swatch, and sample are treated as identical without a clear comparison order. We help you name the artwork version, selected colour direction, area where a motif must or may fall, and the visual question to resolve before the product moves forward. This keeps the visual choice connected to the sewn article and the exact commercial variant. It also protects a chosen creative direction when new colourways, packs, or crown patterns are explored after the initial sample. The same discipline can reduce confusion between a seasonal visual proposal and a colourway that your team has actually selected for the SKU. It gives your brand a clear path from the original creative direction through the final photographed and packed article. Confirming the chosen visual route before cutting helps prevent costly rework when a pattern or motif hierarchy changes.
Assign a usable colour reference for every visible colour
A color name alone is rarely enough for cross-functional review
Connect the chosen reference to the crown, ties, and pack artwork
We ask you to identify the reference your team will use when it selects colour direction: a controlled physical swatch, named digital file, chosen prior sample, or another reference your organization can use consistently. Then state whether the tie matches the crown, creates contrast, carries a print, or changes by variant. This keeps a descriptive colour name from becoming the only instruction available to a buyer, sample reviewer, and pack designer. If the desired relationship remains open, say so and request options. The sample review can compare visible areas under conditions your team selects without overstating that a screen representation guarantees the final appearance.
Translate flat artwork into crown panels and tie ends
Motif scale, direction, and seam allowance need a sewn-product plan
Avoid approving a screen proof that fails once the article gathers
We discuss where artwork can be cut, where it may gather, and whether a focal motif needs controlled placement. A stripe, border, floral, logo-like element, or repeated graphic can behave differently across a crown, band, and tapered tie ends. Decide whether variation is acceptable, whether artwork must read from a particular customer view, and whether an edge or seam must avoid a defined area. Do not expect matching motif crops across all bonnets unless the artwork, cut plan, and review method explicitly call for controlled placement. A finished sample is the useful place to inspect how the selected print interacts with crown shape and tie route.
Review surface direction on the assembled product
Color, luster, print, and visible face should be checked after sewing
Keep sign-off tied to the exact configuration
We advise reviewing the assembled bonnet rather than selecting colour or surface direction from a loose swatch alone. Look at crown, edge, seams, ties, and contrasting components under the viewing conditions your brand considers relevant. Note whether a surface appears consistent with the selected brief, whether a print is interrupted at a join, and whether a bow or wrap changes visual hierarchy. If the product uses two faces, review both orientations separately. State the exact sample and artwork version being compared so a later change to pattern, layers, or pack does not silently carry over a visual choice meant for another configuration.
Control Fold, Pack, Inserts, and SKU Identification
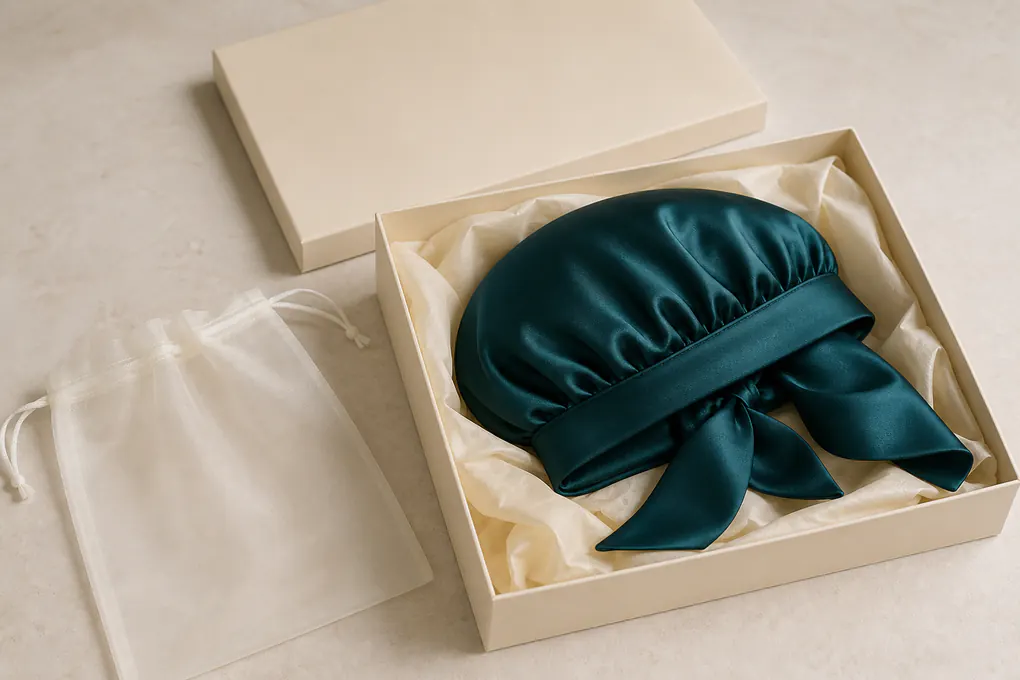
We plan the selling unit around the actual tie bonnet rather than treating packaging as an afterthought. The crown should arrive in the intended shape; ties should not create a confusing knot or crush the product; and labels, inserts, barcode areas, and pack count should identify the exact variant a receiver handles. A card, pouch, tissue wrap, sleeve, box, or multipack may each be appropriate depending on your channel, but none can be chosen responsibly without the selected product in hand. We help buyers write the pack question so prototype, merchandising direction, and receiving process are connected from the first sample instead of being patched together at the end. The selected pack then becomes a practical part of receiving, photography, and customer presentation rather than a last-minute add-on. Before sign-off, compare the packed article with the intended listing image so visual merchandising and delivery condition do not conflict. Make a receiving check easy by ensuring the outer information can distinguish the selected color, crown variant, and selling-unit count. This matters especially when a collection includes similar bonnets with different closure or printed-artwork directions. It also helps customer-facing teams explain what arrives without relying on a product photo alone.
Define the fold with the tie position visible
A deliberate fold protects the crown and teaches intended presentation
Prevent pack handling from changing the product customers expect
We ask how the bonnet should sit when a customer first opens the selling unit. Identify whether the crown is folded inward, laid flatter, lightly filled, or presented with a visible bow or wrapped tie. State how ties are retained during packing and whether a card, tissue, band, or other element protects a particular area. The pack design should preserve the selected silhouette instead of forcing the bonnet into an arbitrary small space. Review this on the assembled sample: open it, remove the article, inspect creases or transfer, follow the tie route, and compare the result with the intended visual brief. This gives sourcing leaders a tangible way to approve presentation.
Map every selling-unit component and information area
Cards, pouches, inserts, labels, and codes need a shared hierarchy
Avoid a pack that mixes colors, sizes, or product directions
We build a component list for the selling unit. It can include the bonnet, pouch or sleeve, card, tissue, insert, seal, barcode label, and outer-carton relationship. For each component, state its purpose, artwork version, visible information, and link to the correct SKU. If the range includes colorways, capacity variants, or different tie directions, define how a warehouse or retail receiver can distinguish them without opening every unit. This is not unnecessary paperwork; it prevents a product identifier from being applied to the wrong packed article and gives creative and operations teams one view of the presentation.
Review pack performance as part of sample comparison
Packaging review should include opening, count, and visual condition
Check the exact product and pack combination before broader use
We recommend treating pack review as a separate decision within the same sample cycle. Assemble the chosen bonnet, selected tie position, label set, and pack components; then inspect the unit after handling and opening. Look for crown distortion, crushed tie ends, scuffs, colour transfer, loose components, unclear variant identification, and count errors. Where a market requires specific labeling or barcodes, provide the requirements your team has selected rather than assuming a generic format. State the sample and pack-artwork version used for comparison. That makes it possible to retain a successful product construction while changing only the presentation issue that remains unresolved.
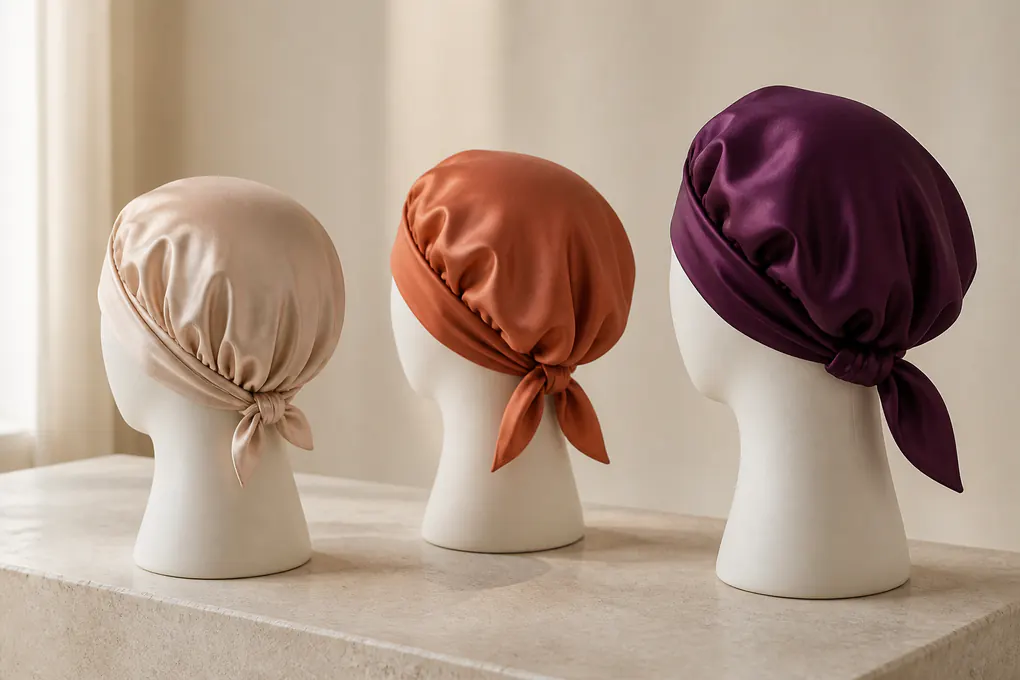
Sample the Crown, Tie, and Presentation as One System
We use sampling to resolve decisions that cannot be settled responsibly through text, a flat drawing, or a colour reference alone. A tie silk bonnet sample can show the relationship between crown capacity, panel geometry, tie route, seam finish, visible face, label placement, and pack direction. It is most useful when the buyer names the decision the prototype should resolve. A sample request that merely says make one leaves product, purchasing, and quality teams without a clear comparison point. We help turn open questions into a short review plan so each prototype has a reason to exist and each comment can lead to a deliberate next action. A focused sample round reduces the risk of confusing a visual preference with a construction choice. It also helps a procurement manager decide whether the next spend belongs in changed construction, updated artwork, or a revised selling unit. For each round, state which elements deliberately remain open so a later reviewer does not mistake an exploratory detail for a chosen feature. This keeps future requests tied to what the selected sample shows, not merely to a remembered visual impression. A focused review brief also reduces the chance that a successful construction choice is discarded because an unrelated artwork decision is still unresolved.
Choose the first sample question before requesting materials
A prototype should resolve the decision with greatest commercial impact
Do not ask one sample to settle every open detail at once
We start by asking what uncertainty most threatens the product direction. It may be crown capacity for a named hair arrangement, location of a bow, relationship between visible faces, printed motif on a gathered panel, or the way the product fits its selling unit. State that question in the sample request and identify details that can remain provisional. This lets the prototype focus on the relevant physical question rather than becoming an overloaded attempt to finalize pattern, artwork, labels, and carton at the same time. A buyer can still show the broader commercial brief; the review sheet simply makes clear which decision has priority in the current iteration.
Review the sample in the condition it represents
Product, tie setting, and pack must match the review question
A loose component cannot replace an assembled-product observation
We ask reviewers to inspect the sample as an assembled product. If the question concerns fit, follow the selected wearing sequence. If it concerns print placement, examine panels after they are gathered and tied. If it concerns presentation, place the finished article in the chosen unit and open it as a customer would. State the version of pattern, artwork, colour direction, labels, and pack components being compared. This protects the review from a common error: a team selects one feature on a loose piece and later assumes that choice applies after sewing, tying, folding, or variant changes have altered the article.
Close each sample round with a usable decision summary
Keep selected, changed, and unresolved points visible to purchasing
A named next step is better than an informal trail of comments
We close a review by listing what is selected for the specific sample, what must change, and what remains outside the current choice. Link every comment to an observable location or condition. A clear decision summary might keep the crown panel route, move the tie anchor position, defer final label artwork, and request a pack review after the next construction sample. This does not turn a creative process into bureaucracy. It prevents a chosen crown route from being confused with a fully selected SKU, and it lets purchasing compare the next quote or sample request against the same product direction.
Build a Product-Specific QC Plan for Tie Bonnets
We keep quality review connected to the features that make this bonnet distinct. A generic visual checklist can overlook the crown panel that controls capacity, tie anchor that changes the wearing sequence, edge that frames the face, or pack detail that identifies a variant. A useful B2B plan names product reference, chosen comparison point, selected measurement conditions, components that need attention, and the way findings should be reported. It does not invent a certification, universal tolerance, or test result. It gives your buyer team a disciplined way to ask for relevant observations before goods are accepted against a defined configuration. The point is a readable decision summary, not unsupported assurance language. It should make it easy to distinguish an assembly issue, a labeling error, a pack discrepancy, and an unresolved development question. This keeps a final commercial decision connected to product-specific findings rather than a vague statement that an accessory passed inspection. It also enables a buyer to isolate corrective action without confusing it with a later product change. Use this summary to decide whether the next action belongs in sewing, pack correction, pattern adjustment, or a direct buyer conversation.
Prioritize features that define the selected tie bonnet
Crown geometry, ties, anchors, seams, labels, and pack need checks
Make inspection reflect the product rather than a generic accessory list
We begin with the selected product reference and identify characteristics that distinguish it. For a tie bonnet, that may include crown shape, panel symmetry, opening and edge appearance, tie width and route, anchor alignment, seam placement, label location, colour or print direction, and packed completeness. The checklist should tell the reviewer where to look and what comparison applies. It should not turn an unagreed technical limit into a fact after goods are made. If a dimensional point matters, use the condition and method selected in the product brief. If a visual feature matters, retain a chosen image or sample reference showing the intended result.
Separate workmanship observations from fit review questions
Different findings need different records and follow-up actions
A seam appearance issue is not the same as an unresolved fit decision
We distinguish visible workmanship review from questions that require a selected use condition. Workmanship observations can include local seam alignment, edge finish, tie attachment appearance, label placement, colour transfer, or pack completeness. Functional questions may concern the entry sequence, crown behavior under a named hair arrangement, or access to the tie route after adjustment. The report should not blur those categories. State the item, location, observed condition, quantity examined, and comparison reference. This makes it easier for a buyer to see whether a concern is isolated, whether it affects a variant, or whether the original product instruction needs clarification.
Require findings that allow a purchasing decision
A usable report explains what was examined and what needs action
Avoid a pass statement that cannot be traced to the product
We recommend a concise reporting structure that names product reference, version, sample or lot identity where available, units or areas examined, conditions used, findings, and requested next action. Photographs can support the report when they identify location and do not replace written observation. Where a buyer needs a particular method, acceptance level, or external documentation, supply that requirement in writing for the selected configuration. Do not assume it exists because a product category commonly uses a phrase such as quality checked. A clear report helps your purchasing team decide whether to proceed with the observed result, request correction, compare another sample, or pause the commercial decision until the product brief is complete.
Prepare a Quote-Ready Tie Silk Bonnet Brief
We make the RFQ useful by asking for decisions that change the item a supplier is being asked to discuss. A comparable request connects product role, crown construction, component scope, tie route, artwork or colour direction, labels, pack, variant split, destination, and the question sampling must resolve. A brief can state unfinished values honestly while explaining where you need options and which decision will determine the next step. That lets purchasing compare responses against the same article and prevents an early commercial discussion from being mistaken for a commitment to price, minimum quantity, lead time, certification, or a configuration that has not been selected. It gives a serious buyer a route to ask focused questions without exposing retail pricing. The inquiry is strongest when your team shares both the selected product facts and the commercial decisions it still needs to make. A concise but precise brief protects your budget by preventing unlike crown, tie, and pack options from being priced as if they were identical. That transparency gives buying stakeholders a clearer basis for choosing the next sample or comparable supplier response.
List the product facts needed to identify the article
A quote-ready brief starts with one clear configuration and variants
Give every commercial response the same physical starting point
We recommend listing intended product name, your product reference, crown silhouette, target use scenario, panel or volume direction, selected material scope by component, tie appearance and route, visible colour or print, label needs, and selling-unit concept. Add a reference sample or visual only when it accurately represents the feature you want reviewed. If a required value is not settled, describe the decision needed instead of hiding the gap. For example, ask for options tied to a named crown route or pack format rather than requesting a generic silk bonnet quote. This helps suppliers respond to the product you intend to source and gives your team a transparent basis for comparing what each response includes.
Add commercial and destination details that affect discussion
Channel, variant quantities, destination, and timing belong in the request
State information needs without publishing retail prices
We ask buyers to include intended sales channel, destination market, approximate variant quantities, desired sample stage, pack expectation, and decision date or timing context. Those inputs may affect packaging, labeling, documentation, shipment planning, and the way a supplier organizes options. They do not justify inventing price, minimums, capacity, or delivery commitments on a public page. If your team has a purchasing target or decision deadline, share it privately through the inquiry so it can be discussed in relation to the selected configuration. This keeps the site focused on a serious B2B conversation rather than retail-style price display.
End the RFQ with the next sample decision
A named sample question turns a broad request into an actionable project
Ask for information that resolves the issue blocking your product plan
We finish the brief by naming the issue that prevents the project from moving forward. It may be crown shape for a specific hair arrangement, route and appearance of the tie, layer relationship, print placement question, label location, or the way the bonnet should open from its pack. State the condition in which you want it reviewed and what decision your team will make from the observation. This gives the inquiry form a useful purpose: it gathers information required for a product-specific response instead of generating a vague sales lead. When requirements change, update the revision and keep the earlier decision visible so the commercial conversation remains coherent.
B2B procurement questions for tie silk bonnets
Does a tie closure prove that one bonnet will fit every wearer?
No. A tie changes how the selected bonnet can be adjusted, but crown geometry, hair arrangement, entry sequence, tie setting, and the reviewed customer context still need product-specific assessment.
Can a tie silk bonnet description be used as a material claim for every component?
No. The requested material scope should name the crown exterior, interior face, ties, edge or band, labels, trim, and any other relevant component separately.
What should a buyer send before requesting a tie-bonnet sample?
Send the intended customer and channel, crown or visual reference, hair-volume scenario, tie direction, component scope, color or print direction, pack needs, variant quantities, destination, and the decision the sample must resolve.